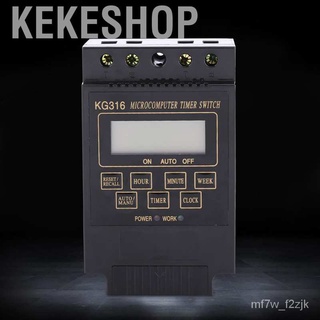
ขาย Kekeshop Kg 316 T Ac 110 V 220 V ไมโครคอมพิวเตอร์จับเวลา ราคาที่ดีที่สุด
5
4
การให้คะแนน
4
ขายแล้ว
฿280
31% OFF
฿192
| เรือจาก | ต่างประเทศ |
|---|---|
| type | AC110V AC220V |
รายละเอียดสินค้า
Features:
This
timer switch could automatic turn on/off all kinds of electric
equipment according to the time user set.
The 110V timer switch has a inbuilt battery for storing data, and 220V timer switch uses 1 AA battery(not included).
Repeat programs with 10 ON and 10 OFF settings, and the timing bound is from 1 minutes to 168 hours.
The time switch setting time can be cycled by days or week.
The timer switch is great for controlling
street lamps, neon lamps, production equipment, radio and television and
many other industry or home appliances.
Specifications:
Input Voltage: AC110V, AC220V(Optional)
Contact Voltage Rating: 180V to 240V
Switch Load Capacity: 25A(resistive), 20A(inductive)
Power:
On/Off Operation: 10 on and 10 off(manual/auto)
Timing Bound: 1 min to 168 hours
Operation Temperature: -20℃ to 60℃
Humidity:
Error:
Battery(for 220V): 1 AA battery (not included)
Size: 120 x 74 x 51mm / 4.72 x 2.91 x 2"
Instruction:
NO. 1, Set Clock(present time):
Press and hold "CLOCK" button then press "WEEK",
"HOUR" and "MINUTE" buttons.
NO. 2, Set "1 on": Press "TIMER"
button and LCD displays "1 on" at the bottom left. Then press
"HOUR" and "MINUTE" buttons to set "1 on".
NO. 3, Set "1 off":
Continue to press "TIMER" button and LCD displays "1 off"
at the bottom left. Then press "HOUR" and "MINUTE" buttons
to set "1 off".
NO. 4, Continue to press the
"TIMER" button (LCD successively displays "2 on", "2
off", "3 on", "3 off"... ... "10 on",
"10 off") so you can set them all. If you only need "1 on",
"1 off", you must press the "TIMER" button (LCD
successively displays "2 on", "2 off", "3 on",
"3 off"... ... "10 on", "10 off") and press
"RESET/RECALL" button to set all other "on" and
"off" as "-- : --" instead of "00:00" (shown on
the LCD).
NO. 5, After setting, press
"CLOCK" button so LCD displays present time. Or if no button was
pressed in 30 seconds, it will automatically display present time.
NO. 6, When connected to circuit,
the red light indicates if the circuit is powered and the green light indicates
if the switch is closed.
NO. 7, Press the "AUTU/MANU"
to connect or disconnect circuit directly.Press "AUTU/MANU" button till the LCD displays
"off" at the bottom, and then press "AUTU/MANU" button
again to set back to "Auto".
NO. 8, Press "TIMER"
button, and then press "WEEK" to set which day or days each week you
need the switch to work such as (Mon, Wed, Fri) or (Tue, Thur, Sat), (Mon, Tue,
Wed) or (Thur, Fri, Sat), (Mon to Fri) and (Sat, Sun), etc.
Wiring:
Picture 1. Direct control wiring is for single-phase powered electrical appliances with lower power
consumption than load capacity of this switch.
Picture 2. Single phase expansion
wiring is for single-phase powered
electrical appliances with higher power consumption than load capacity of this
switch. You will need an alternating current contactor with more capacity than
the electric power consumption to expand capacity.
Picture 3. Three-phase wiring is
for three-phase electrical appliances, with a AC220V, 50Hz control contactor
coil voltage, you will need a external three-phase AC contactor.
Picture 4. Three-phase wiring is
for three-phase electrical appliances, with a AC380V, 50Hz control contactor
coil voltage, you will need a external three-phase AC contactor.
Package Includes:
1 x Timer Switch
Note:
Please note that the new type and old type of this product will be sent randomly, and make sure you will not mind before ording.
#DigitalTimer #DigitalTimeSwitch #ProgrammableTimer #WeeklyProgrammableTimer #ProgrammableTimerSwitch